Thursday, December 30, 2010

For me!

When I was trying to figure out what to do next, it suddenly ocurred to me that I am heading to Idaho in 3 weeks for the lovely Stellas first birthday, and I don't own a hat!  Talk about your Aha moment.  So I measured my head, figured out it was only an inch bigger than the biggest size in my baby hat book, so I modified the pattern by 4 stitches and made a hat for myself.

Isn't it cute?  This was a really easy hat to make, I just carried the second color up the 4 rows until I needed it again.  I think this is a definite candidate for a kids hat that I could make over and over and donate somewhere like I did with the baby blankets.  Definitely a 'repeater'.  And think of all the cool color combos - a simple pattern in worsted weight on size 9 circular needles.

Wednesday, December 29, 2010

Ruffle Hat

I had to try the ruffle hat.  So pretty and feminine.  Poor Stella, what will she do with so many hats? Maybe I need to move to grownup hats, save them up until next winter and then donate them.  Hmmmm.  Or maybe there's a charity like Project Linus that takes hats instead of blankets.  I'll have to check into that.

The pom-pom didn't work out, so I went with a tassle.  Kind of looks like a ponytail.  The hat seems too 'deep'.  It said 6 inches before starting the wind down... 5 would have been plenty.  Live and learn.  I would definitely make this hat again. 

Tuesday, December 28, 2010

The fun continues...


So, once I got started I couldn't stop. At first it was about knitting something new, but these things are so small! You can finish one in a day... and of course it opens up a whole new world of embellishment possibilities.

I'm hoping that I can learn a little bit of crochet so I can make stars and flowers and things to 'pretty up' my creations.  So I got a book (I always go to a book first) called Crochet Flowers for Every Wear by Kooler Design.  I bought a crochet hook and assumed I could teach myself, but my first attempt ws NOT a success.  I gave up and went with a knit flower instead (which was also a brand new thing to me).
So today I made a quick trip to Walmart to pick up more crochet hooks (I decided that the hook I had was too small and that's why I was having so much trouble) and while I was there, I saw this doll with a giant head and thought she'd be a perfect hat model.  (OK, I realize that is a little wierd)  and then of course I had to go find something closer to the right size to model the dog clothes (getting a little wierder).
The hat above was too big around, and funny thing is, I knew it when I cast it on, but since I was just beginning I went with the pattern.  Anyway, I wound up taking a couple of tucks in the the ribbed brow. Which was probably about 8 stitches worth - next time I'll adjust what I cast on.  I wlso thought the yarn was a little 'stiff'.  Might try it with another kind next time.

The dog sweater definitely had a problem with where the dog's leg holes went.  I had to take it apart and move them.. This is an ongoing problem with this pattern method.  But now that I know about it, I can make the adjustment, no problem.

Monday, December 27, 2010

Michael's Gift Card

It's all Brent's fault!

My husband's brother, tired of the annual bookstore gift card, branched out and got me a Michael's gift card this year.  Naturally I went right out and spent it the day after Christmas. 

Having made a couple of dozen of the same exact baby blanket over the last year, I felt the need to branch out myself.  So, (Yvonne) I got a book on making dog sweaters.  (Stylish Knits for Dogs by Ilene Hochberg) And, (Ryanne) I got a book on baby beanies (Baby Beanies by Amanda Keeys).  I also got circular needles in baby hat size and some (adorable) yarn to work with.  Nothing fancy, all washable, of course.  (Who in their right mind would knit for kids or dogs in non-washable yarn)?  Then I went straight home and made one of each.  

I have no idea whether either one will fit, since both the dog and baby are 3000 miles away!  (The dog's chew toy does not make a very good model)  Anyway, I had fun, am working on another hat and will send all these off for feedback.  The good news is that I can already see how some of the stuff from the baby hat book can be used to snazz-up the dog sweaters!   New Year fun...


Saturday, April 10, 2010

Free Motion Sewing

Ha! I am learning a lot of stuff!  If you haven't checked out my link to Ellen Lindner, you should.  I downloaded her ebook class on Color and spent some time working on it yesterday.  I probably have  a couple more days of work to finish it.  But by watching a video of her and looking at her quilts and looking up stuff on 'art quilts' I discovered this thing called free motion sewing. 

It turns out my sewing machine has a couple of other feet I've never used.  A 'darning' plate and foot, and a 'walking foot'.  If you use the darning foot, you can sew backwards, forwards, sideways, in circles, it's unlimited!  You have to be careful not to make a mess of the back (by pulling the threads to the top before sewing.  Anyway, here is my first try... you can see the possibilities.  You can use fabric to make pictures...  how fun!


I learned something else too... it's called 'hiding your tails'.   How could I have been sewing for close to 50 years and not know about this?  It's basically leaving a longer tail on a thread and then sewing the tail back into the piece instead of just clipping it off.

Friday, April 9, 2010

Last of the Cat's

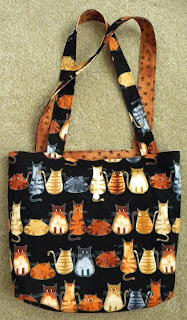
OK - here's the other cat bag... also reversible, but one pocket in and one out no matter which way you turn it...  two projects finished.  I guess I think the pocket is too big.  The nice thing about this project was now I know how to make this bag in any size or shape.  good learning experience, and if nothing else you can use them for groceries...save the earth!


Cat's in the Bag

OK - making bags is really fun and addictive... this is a different kind of bag, made in a cat theme for a friend.  This was my first try and I made a few mistakes... but who knows, one girl's mistake is another girl's 'feature', so we'll see...


This is one side of the bag, featuring contrasting snap pockets, one on each side.... OR... the bag is reversible, moving the pockets to the inside.


So, pretty fun, right?   Look out friends, you are all getting bags based on your interests, whether you need them or not!

Thursday, March 25, 2010

In the Bag

Today I amused myself by making a spring bag.  This is from a 'Lazy Girl' pattern.  It was my first time trying the pattern and of course I made several mistakes, but the next one will be easy.  I didn't really like the way some of the seams were visible inside the bag, so I may have to rethink the instructions a little.  Still, it's very cheerful and I like the 6 pockets on the outside...

Monday, March 22, 2010

Taking Flight 4

The second winged lady is done... it's much better, although not great...still don't seem to have all the right stuff - and of course there's that little problem with the fact that I can't draw!!
Also, I'm getting my own ideas, and I want to try a couple of those
now, then I'll move on to the next project in Kelly Rae Robert's book.

Sunday, March 21, 2010

Taking Flight 3

Well, I did as much as I can on my 2nd winged lady today... now I have to wait for the oil paint to dry.  I forgot to sand the face area again before putting on the oil paint, and I still don't see how to put it on smoothly. I have to run out and get some linseed oil to clean my hands and the brush I tried to smooth it with. I tried heating it with a hair dryer because I heard it had a wax component and thought it might melt smooth. Didn't really work...


So, tomorrow, I'll be able to add the face and the hair.  I need some kind of pen to write a 'message' on it.  I'm not really sure what that message is, but I'm leaning toward 'try', or some kind of quote related to 'try'. Anyway, I like this one much better.  The background papers were from a hymnal and an atlas. The paints are a more subtle (not primary) palette.  I used my cheap acrylics, because I had a better variety of colors.  I put something more interesting under the skirt - just words from Oprah magazine, but better.    I also had the charcoal pencil, which smeared nicely!

Friday, March 19, 2010

Taking Flight 2

I finished my 'winged lady' this morning per the instructions in Kelly Rae Robert's book Taking Flight. 


I like her.  I especially like the gray hair... all the ladies I make will have gray hair, an homage to all us grandma's that decide to get creative a little later in life. 

This was my first try with the Shiva Paintstix... I was very pleased with how easy it was to blend them with my finger, I only had three, so the face is painted on, which is different from the instructions, but I thought it came out well.  I'll get black and red paintstix before the next project.  It's a good thing the art store guy told me about the 'skin' on the paintstix,  I don't know how long I would have tried to use them as crayons without getting any paint on the paper.

I didn't have a 'Stabilo' black pencil or a graphite pencil, so the wings are lined in black paint instead of a more charcoal like line.. The yellow body is huge! don't know what I was thinking... also, if you are going to wipe away paint to see what's underneath, you should put something interesting underneath! (duh) what was I thinking? So I improvised... Also, if you are going to wipe off paint, use thinner paint!  I used really thick paint and had a heck of a time wiping it off.

I still don't really get the smeared paint background... maybe it also needs to be thinner? I don't know... I think it's ugly,.  My favorite part (surprisingly) is the head.  Oh well, next project...


Thursday, March 18, 2010

Taking Flight

I finally got up the guts to buy Kelly Rae Robert's book 'Taking Flight'.  It was set to be my last art book... if it didn't get me going, I was going to give away all my art stuff (that I've never used) and quit kidding myself.  I don't understand why I have this 'art' voice screaming in my head anyway, I am seriously NOT artistic...although I am creative.. I like to play..
So back to the book.  I got the book and started reading it.  The rule was that if there were project instructions, I had to do the project before moving on. (sigh)  The first project is to make collage on hard book covers. So I ran out and got some stuff and started the project. 

The first part was to make 'letters' on cloth... the instructions said 1" x 4" which is pretty small - I don't think Kelly is using a 1" wide strip in the demonstration photos... anyway, I followed the directions and here are my letters. (whoops, the t is upside down)  I think they just look sloppy... there were no instructions for what to do with the back of the letters (which are plain white interfacing) so I painted them.

I know this is not going to be a great-looking project, I know I'm going to have to make a lot of ugly stuff before I figure out how to make better stuff, but making ugly stuff is not nearly as much fun as making cool stuff.  It's embarassing!

So, after cutting the covers off the a hardcover book, I was instruceted to collage papers onto the covers to make a base.  I also put just a little material on the covers, since I have quite a lot of fabric. Here are my 'base' covers.


The book covers were about 9" square. These are big pieces of paper, which made them hard to glue flat... I would probably use smaller pieces next time, but I was kind of looking at Kelly's project and she seemed to use at least one big piece as a background, but they get covered with paint and who knows what else anyway, so who knows what they will look like after the next step. 

So, I feel like I have made progress.  I've been lurking on other sites, and trying to figure out process, but have only tried a couple of 'paper paintings', nothing that actually involved painting over a collaged background.  So here goes.  Thanks Kelly Rae.  Check out her site and see her great stuff!

Friday, February 26, 2010

Woven Hearts

Although an my body was screaming for an art project, I couldn't think of anything that matched my minimal skills... then, while perusing some of my favorite sites, I got an idea.  Since I don't really understand color much, why not use paper that's already 'designed'.  So I pulled pages out of my current Oprah mag and made these woven hearts! One from each page (well, sometimes I used two separate pages.  I have no idea what to do with them, maybe they'd make nice cards. I really just consider them color training.  I'll keep them around to remind me what goes with what...

I like the script text on this one.

I like these golden colors against this blue.

I like the the silhouette bits in this one.  One page is an add for crackers.

This makes me think of tomatoes.  It's made of a page of Oprah cleaning out her closet and holding a pile of shoes.
Pretty with pink.
Tried something else with this one... modge-podged purple bits to make a background.  The gold is a pile of Christmas presents, the purple is a dark snow scene. It works.
  
This was a bunch of fruit with text beneath.. I like the text mixed in...

Tuesday, February 23, 2010

Our House

View from living room deck

living room deck

living room to kitchen to guest room from deck

living room fireplace

little kitchen

teeny bathroom

guest room / sewing room

guest / sewing / piano room

tiny laundry area

Dale working in his office

the other half of Dale's office

master bedroom

master sink area, Dale's closet, door to shower area then door to my closet

looking down into the living room from the 'hole' in the master bedroom

view from deck off master bedroom

North from/including master deck

south from / including master deck

entryway

skinny front of townhouse (with newly clean dog)

we are the middle column

long skinny garage

our new boat! (haha)
To put this in persepective, see the person at the rear of the boat.  We figure it's about 120 feet long.  It's docked in a canal across the street, and I discovered it while kayaking on Sunday.